
Google is always updating Data Studio’s features to improve user experience (UX). This time they have introduced new page and report navigation features. This enhancement is a major milestone in the development of the product, as visual storytelling has become even more powerful. In this article, I will take you through a step-by-step guide on how to use the improved page and report navigation features.
Also, if you want to refresh your Data Studio design skills, you can take a look at my other articles on some nifty features, including:
- How to extract a report theme from an image in Google Data Studio?
- How to configure a gauge chart to track performance against a goal?
- Learn how to use conditional formatting in Google Data Studio
- How to filter metric values with a slider control in Google Data Studio?
Now, let’s get started!
Add pages to a report
You can add pages to a report to organize related charts, avoid information overload and improve the report performance. The steps are pretty simple.
- Open any Google Data Studio report.
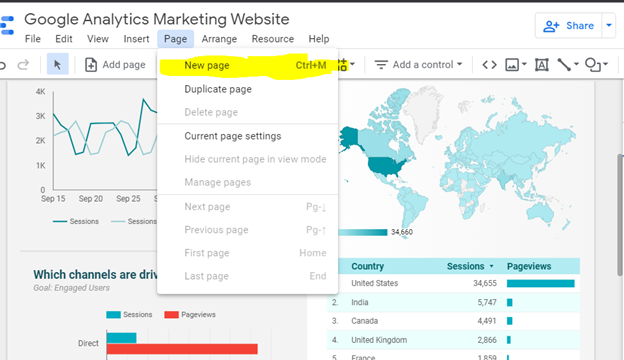
- Click on Page>New Page on the menu.
Alternative ways to add pages
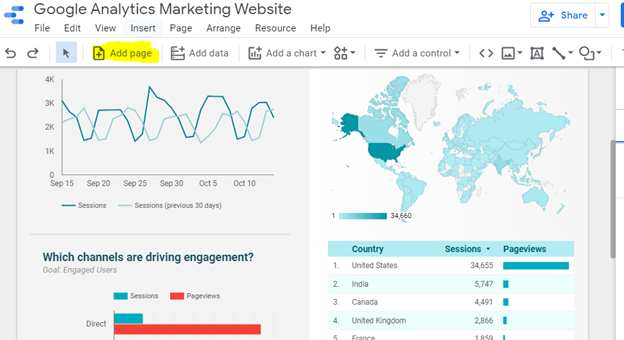
If your report has a single page, you can click on Add page directly from the toolbar.
If your report already has multiple pages
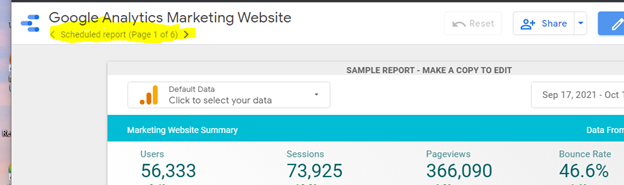
- Click on Page “X” of “X/Y” on the toolbar menu. This will open the Manage Pages pane.
- Now click the “+” sign on the bottom to add a page.
Use a Keyboard Shortcut
Last but not least, the easiest and most convenient way to add a new page is by pressing “CTRL+M” on your keyboard. This will add a new page regardless of how many pages your report already has.
Manage pages pane
The Manage Pages pane not only helps you to add new pages but also to structure your report. For example, you can add expandable dividers, sections, and headers. You can rename a page, duplicate, hide in view mode, change icons or delete it using this pane. Another important feature within the Manage Pages pane is the divider. You can put this to separate your pages and sections to make your structure look neat.
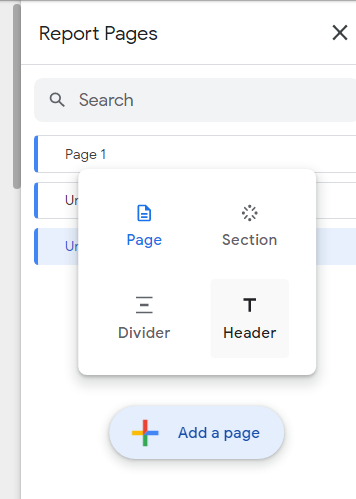
The maximum level of content you can add to a hierarchy is three. This is a major change from what you could do in the earlier versions of Google Data Studio. This is an example of the structure:
- Page (Level 1)
- Section (Level 1)
- Page (Level 2)
- Section (Level 2)
- Page (Level 3)
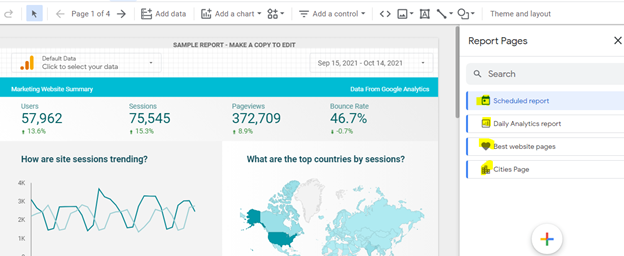
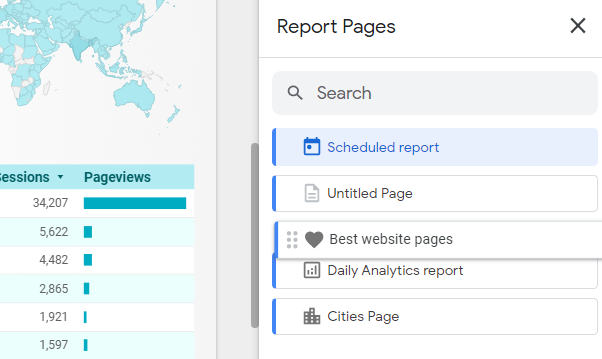
You can also add icons to a section or page. They will appear when you view the report, similar to the example presented below.
How to add icons
- Click on the three vertical dots that appear when you hover the cursor over the pages.
- Click on Select Icon from the pop-up up menu.
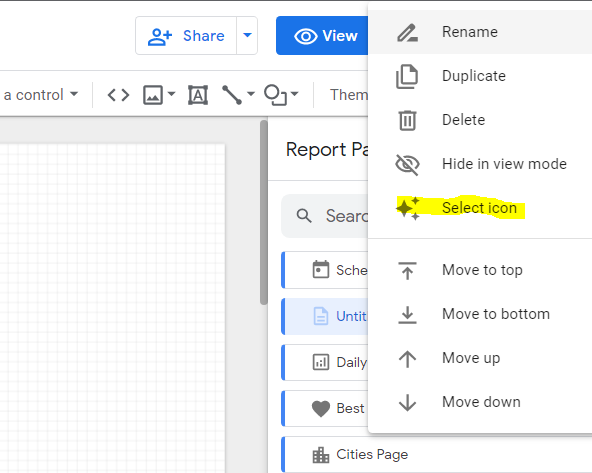
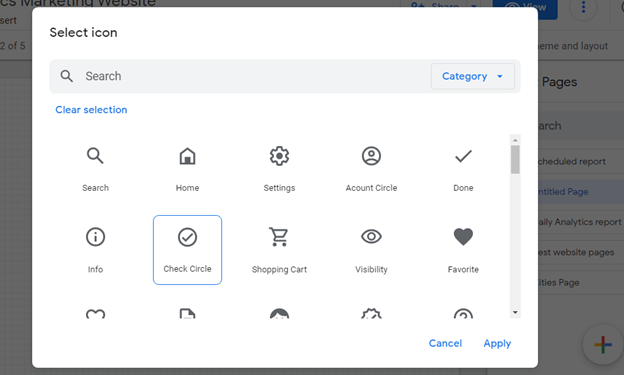
- Choose your favorite icon and click apply.
Note that Icons can only be added to top-level content. Any page within a section cannot have an icon.
How to navigate between pages?
You can navigate between pages in 3 ways:
- Using the manage pane. You can jump to a specific section, page, and header. The pane appears to the right in the manage pages pane.
- Using the keyboard: You can use right, left, up, and down arrows to move to the next or previous page. Additionally, you can use the home and end keys to navigate to the last or first page.
- Using the search box: You can use the search box located to find a section, header, or page by name. However, note that this search box does not search for text inside the report.
Make changes to a navigation item, section, or page
You also have the option to modify each item in the navigation pane.
- Open any report.
- Launch the Manage Pages pane by clicking Page “X” of “X/Y”.
- Hover the cursor over your preferred item.
- Click on the three vertical dots.
- Choose an action you want to perform from the following:
Rename
Every new page is named an “untitled page” by default. Additionally, a new Section or header is named “untitled section” and Header,” respectively. Click rename and choose a better name.
Duplicate
You can create a copy of the current page instantaneously by selecting “Duplicate.” However, it’s not possible to duplicate the whole section.
You can copy a page from one report to another together with all its components. This will automatically add all the data sources in the current report to the target report. However, it will not apply to previous theme and style settings.
Delete
Remove a page, section, or header from the report by selecting “Delete.”
You can undo this action by pressing ctrl+z or Edit>undo. This will not work if you have signed out and back in data studio or reloaded the page. To mitigate this, you can restore the report to a previous point using version history.
Note that once you delete a section, it will delete all the pages within it as well.
Hide in view mode
You can hide a section or a page to prevent viewers from seeing it. This is a useful feature, especially if you have information that you wish only the editors to see. Once you hide a section or page:
- The editors can still edit that section or page.
- Viewers can’t navigate to that section or page.
- If you copy the section or page, the copy will also remain hidden.
- The section or page will not appear in PDF downloads.
You can unhide a section or a page by clicking: the three vertical dots > Show in view mode.
Move
Select the item you want to move and click move to the top, bottom, up, or down.
Re-order sections, pages, or navigation items
You can drag items to change their order in the manage pages pane. This is a quick alternative to the move option.
- Open any report.
- Launch the manage pages pane by clicking page Page “X” of “X/Y”.
- Hover the cursor over your preferred item on the left side,.. and a move option will appear.
- Drag the cursor to move the item up or down.
Change the navigation type
You can customize the navigation type for your report viewers.
- Open your report.
- Click Theme and Layout in the toolbar.
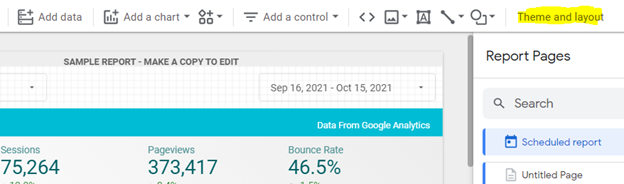
- Choose layout tab
- Select the navigation type under view mode. You can see visuals of each option below.
Left
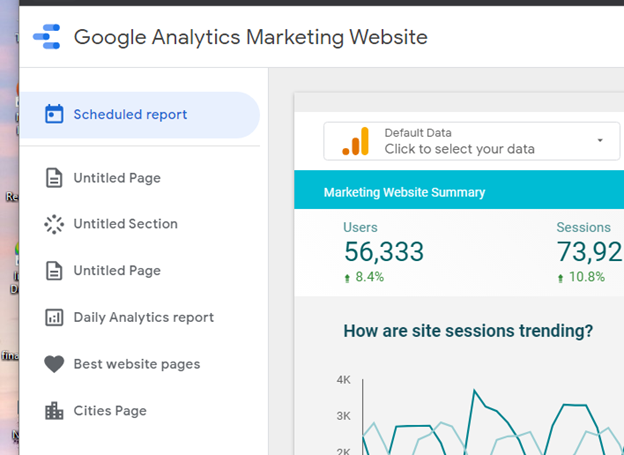
The pages will show up as a collapsible drawer at the left.
Tab
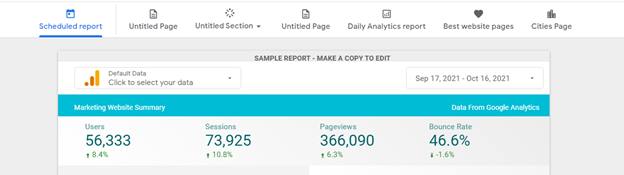
The pages will appear at the top as tabbed links.
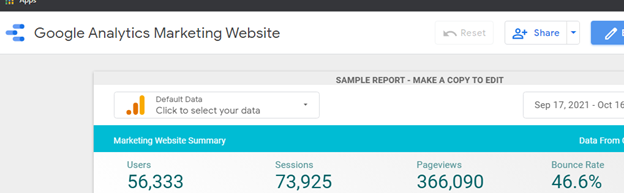
Top Left
The pages will show up as a drop-down menu on the upper left.
Hidden
Navigation will not be displayed.
Final Thoughts on the New Page and Report Navigation
All in all, this new update aims to help users improve report performance, UX and make Google Data Studio a more flexible product. In my opinion, the new page and report navigation feature is a huge advancement, which puts the control in the report builders’ hands.
As such, they can now manage multipage reports by adding text headers, grouping pages into sections, and adding personality and style with Icons. The update is automatic and rolled out globally, so you don’t have to take any actions to enable it.
Dynamic Dashboards and Data Analysis with Google Data Studio – 2021
If you want to learn how to build powerful data visualizations and unlock insights that can help you drive business results for your clients or employers, take a look at my full course on Udemy.

4 comments
This is amazing! I am trying to follow with this formula by grouping certain pages on my website. I have a landing page with 10 locations that are on it that I would like to track who clicks and views the page. How can I do this with Google Data Studio?
Hey Rebecca, great to hear! If you want to group certain pages and create a dimension check out this article that I have, it shows you how to use a CASE statement. Hope that helps 🙂
Can we create a user flow report in data studio which will tell the entry point of the user on landing page and from there how many pages they have visited and from which page they exit
Thank you this article! I do have one question…I am trying to delete sections that contain pages that I no longer need by following your instructions but it does not allow me to delete sections that contain pages. Do you have a work-around for this so I don’t have to delete every page one by one? Thank you for all of your help!
Comments are closed.