As you probably already know, Supermetrics is a one-stop business software that allows marketers and analytics teams to pick up all their marketing data and bring it to their preferred analytics, reporting, or storage platform. In this post, I wanted to explore a lesser-known data integration products that Supermetrics offers, namely Microsoft Azure Storage. The Azure Storage integration allows users to store marketing data in a central location and enables them to connect/select data without tedious data extraction or scripting operations. Besides, it offers customizable template configurations to store data exactly the way you want it.
How does Supermetrics for Azure Storage Work? (in short)
- Login to your Supermetrics portal.
- Click on “Integrations” and choose Supermetrics for Azure Storage.
- Choose the container from your Azure portal where you want to move data.
- Set up the transfer by choosing the data source, schema, and account. That’s about it, data will start flowing to your storage as configured.
Before you begin creating your destination storage you need to configure the Azure container environment. Let us look at the prerequisites.
Prerequisites
- The Azure destination should support containers such as Storage, StorageV2, or Blob Storage.
- You will need an Access key/Connection string for authentication in the Supermetrics portal.
- Make sure you have sufficient permissions. For example, you need to have a Reader and Data Access role. If you are the owner or a storage account contributor then you already have all the permissions and you can proceed to the next step.
- IP whitelisting: If the storage account allows access only from selected networks then you need to whitelist your IP address by clicking firewalls and virtual networks. Add the following Supermetrics addresses and your own IP address.
- 54.155.253.26
- 54.217.129.200
- 54.220.179.34
- Your IP Address
Detailed Step-by-Step Guide on Supermetrics for Azure Storage
Time Needed : 15 minutes
A detailed step-by-step guide on how to configure Supermetrics for Azure Storage.
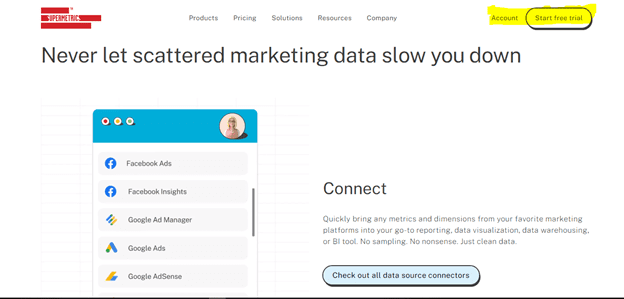
Navigate to your existing “Account” or create a new one.
If you don’t have a Supermetrics account, you can always “Start free trial”.
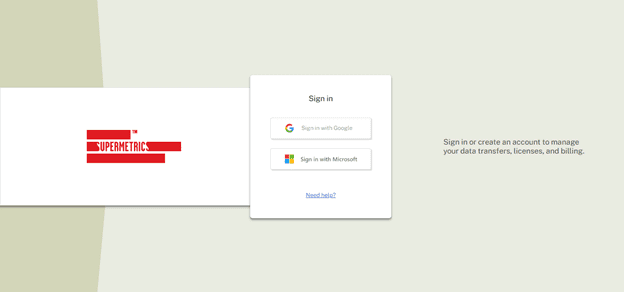
Select “Sign in with Microsoft”
This will enable you to log in with the Microsoft account that you have associated with Azure.
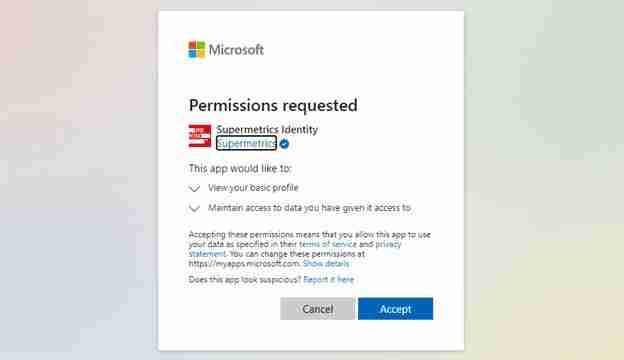
Select your account and “Accept” the Supermetrics’ identity permission request.
This is simple permission granting that applies to most integration products.
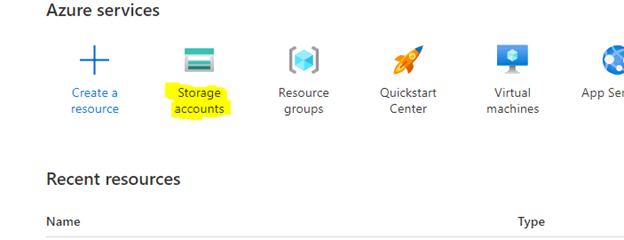
Login to your Azure Portal then click “Storage accounts”
You can get an Azure account with 12 months of free services if you don’t have one as well.
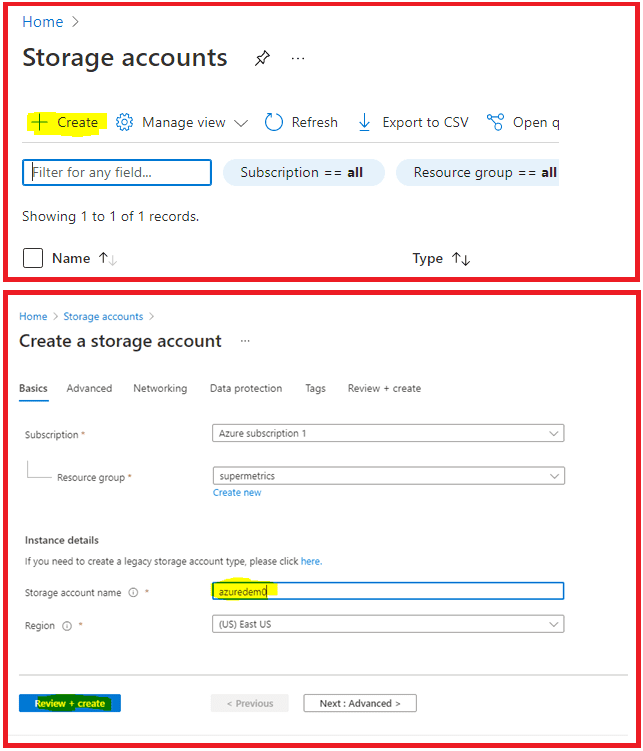
Then press “Create”. If you don’t have an existing “Resource group” you can create a new resource group by clicking “Create new”.
The storage account name will be your container name in the Supermetrics portal. Finalize by clicking “Review + create”. The deployment might take a few minutes, but once finalized, you will get a prompt to “Go to resource”.
Then navigate to “Access keys” on the left-hand side. There, you will find all the info for configuring a Destination in Supermetrics.
*If you cannot access this section then it means that you don’t have enough permissions. Contact your Azure admin to grant you access because you cannot connect without the connection string
You can confirm that your container authentication method is set as an “Access key” by clicking on the “Containers” option in the navigation menu. If the authentication method is not set as an access key then you will not be able to create a destination on the Supermetrics portal.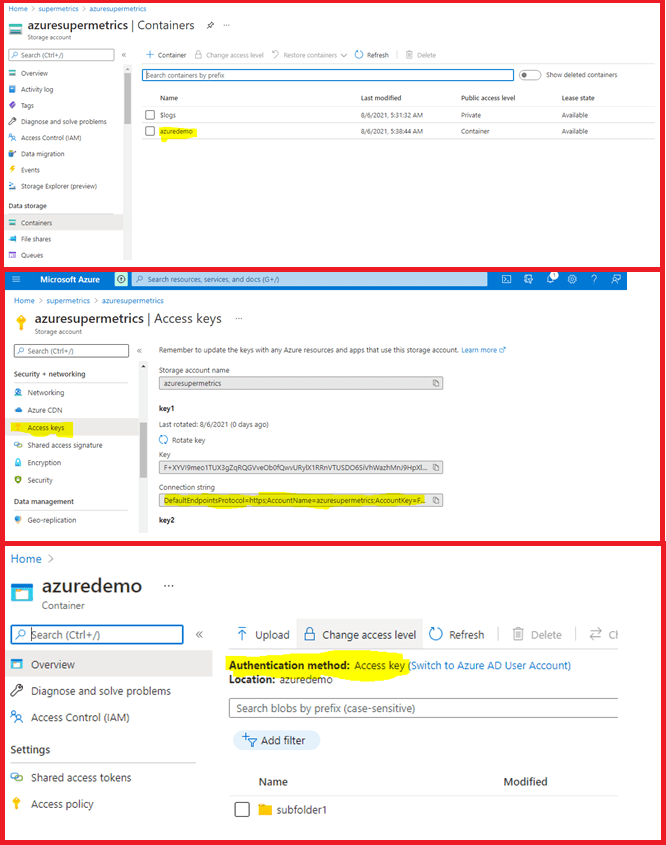
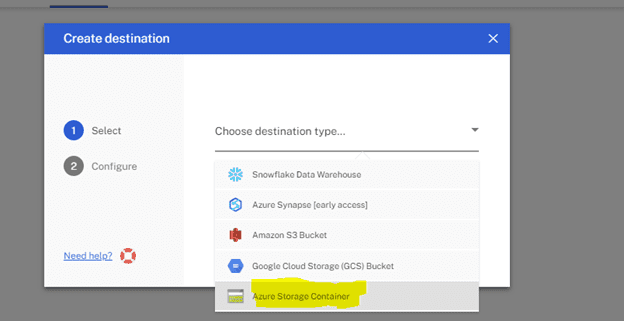
[Go back to Supermetrics, the destinations menu] Click on “Create destination” and then select Azure Storage container then click “Next”.
This will initiate the connection between Azure and Supermetrics.
Fill in the configuration form with the details of your Azure Storage container. Then click “Test” and “Save” subsequently.
8.1 Display name. Give it a unique name that will distinguish it from the other destinations.
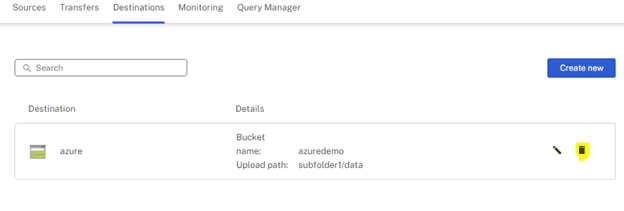
8.2 Container name. This is the Azure Storage container name. You can get this from the Azure portal that you are going to link with Supermetrics.
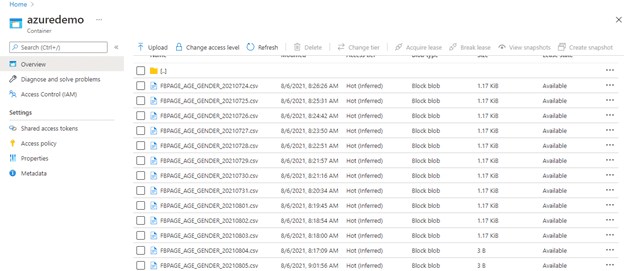
8.3 Upload Path. This is the folder structure that you want to create in the Azure storage container. For example, if you specify a folder path like subfolder1/data then it will be created if it doesn’t exist yet in your container by the transfers.
8.4 Connection string. This is the access key that will allow you to authorize transfers from your Supermetrics portal. The connection string is available under access keys in the Azure storage account. Copy and paste to the configuration in the Supermetrics portal.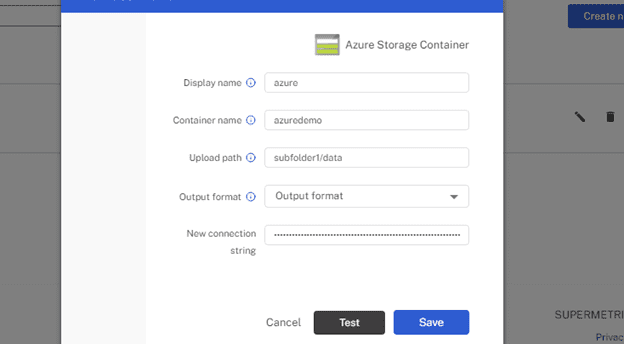
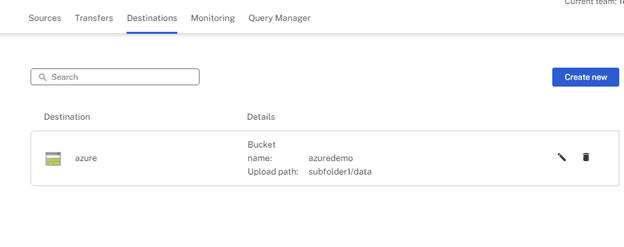
Once complete, the Azure Storage destination should resemble the image below.
Now you can begin data transfer from any data source to Azure Storage.
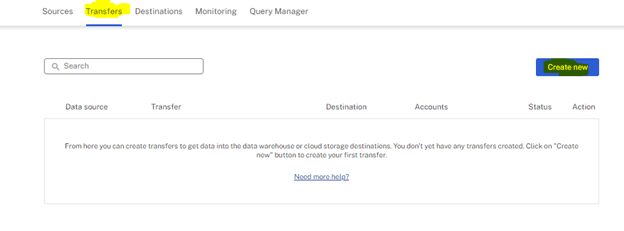
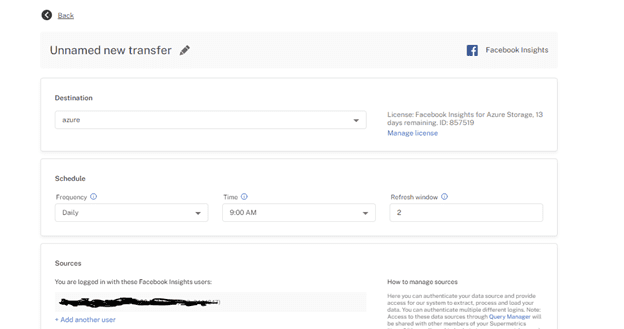
Navigate to the “Transfers” tab and then click on “Create new”.
Transfers are meant for transferring data into a data warehouse or cloud storage solution.
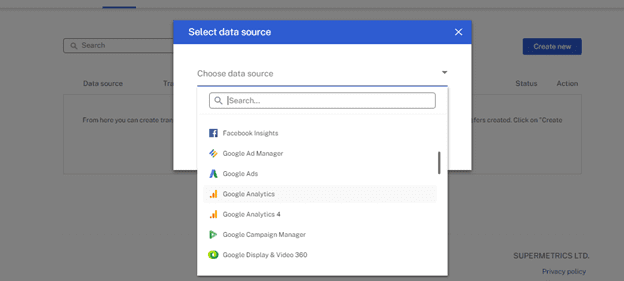
Select your data source from the drop-down menu.
In this scenario, I will use Facebook Insights.
Choose the “Destination” that we have just created, set the schedule, and then connect your account to Supermetrics by clicking add user.
You can click “Save” and that should send your data source to the transfers’ dashboard. If the test fails, double-check all the information that you have entered and make sure it’s correct then run it again.
All the data will be transferred to your Azure Storage Container according to the schedule that you have just created.
…and that is it! 🙂
Tools
- Accounts for both Azure and Supermetrics are required to complete the step-by-step guide.
Materials
- By using Supermetrics you can automate your marketing data transfers to Azure Storage in a matter of minutes.
How to remove a destination from the Supermetrics portal?
This might not be necessary, but in case you want to remove a destination from your Supermetrics account, you can do the following:
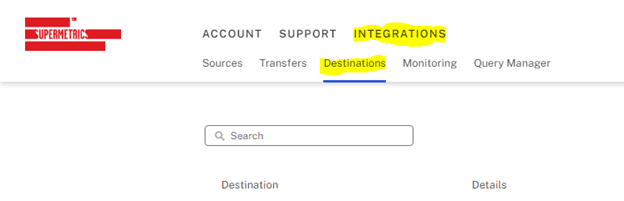
- Click on the destinations tab under Integrations -> Destinations.
- Find the destination you want to get rid of and click on the bin Icon.
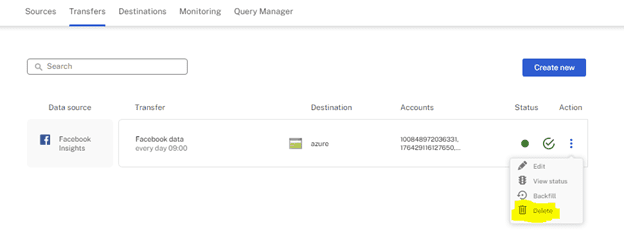
- Click okay to confirm the removal. If you experience an error because there is a running transfer, open the transfer tab then click the 3 vertical buttons and delete from there.
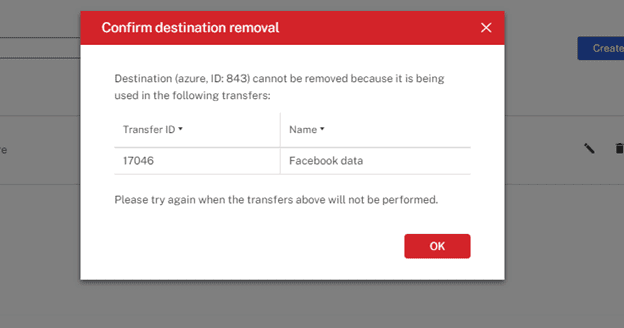
If you want to change the destination path or container you can click on the edit icon and input new values.
Frequently Asked Questions
- Is Supermetrics for Azure Storage free?
You can get full access for 14 days for free without using your credit card. Once the 14 days are over then you will be charged according to the cost of the integration product. You can inquire and find out more about the pricing on the Supermetrics website.
- How safe is Supermetrics?
All the connections in Supermetrics are handled and are encrypted by an SSL by default. Any attempt to connect via HTPP is automatically redirected to HTTPS. Users can revoke the access tokens for Supermetrics at any time. It is also compliant with both CCPA and GDPR policies.
Final Thoughts on Supermetrics for Azure Storage
Azure Cloud Storage is a great avenue for data analysts and marketers to store their marketing data. As usual, Supermetrics acts as the bridge between all your marketing platforms and Azure Cloud Storage. You can store your data in this central location with just a few clicks. Gone are the days where businesses had to write complex scripts for transferring data or doing manual transfers.
I hope this was helpful! If you have any questions, feel free to comment or check out some of the other Supermetrics articles that I have. Also, you get a 20% discount from a Supermetrics subscription via a special promo code (this applies to first-time purchases made from the website ONLY)!
Last but not least, if you are more of a video person, you can also see Supermetrics’ video walkthrough on the topic!
2 comments
Great article! I am a user of both but never thought about combining it. Thanks!
Hey Eduard, thanks! Great to here that you found the article useful! 🙂
Comments are closed.